April 17, 2014: The birth of a new engine - GM ZZ454/440HP/500 LB.-FT of Torque
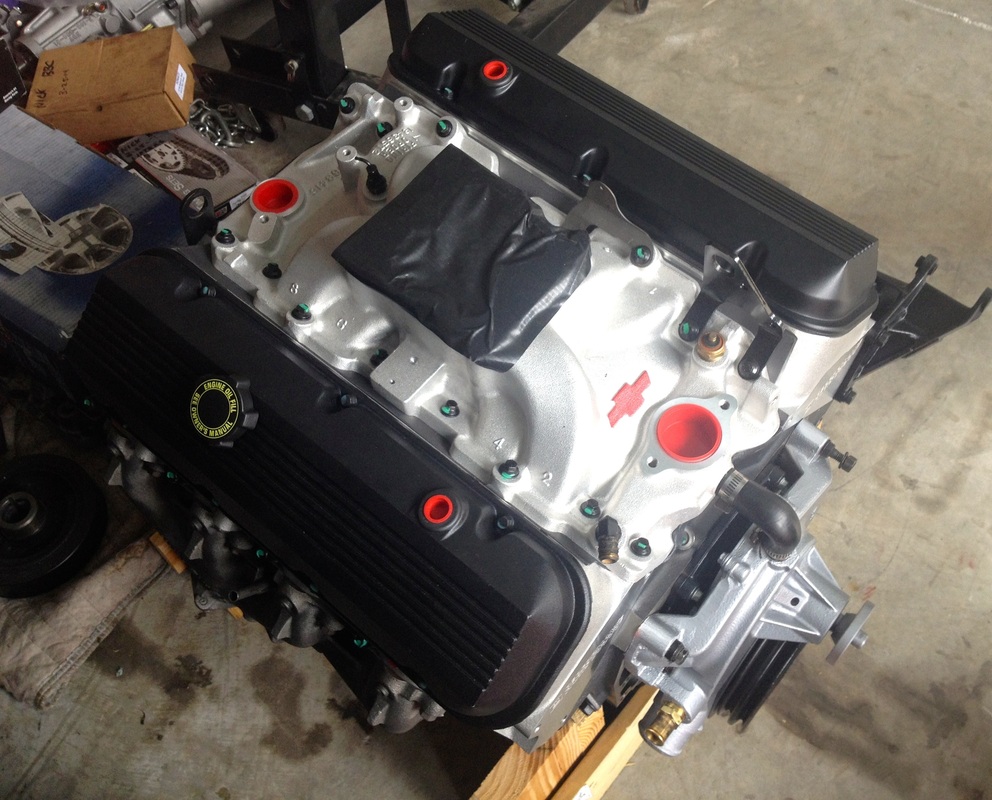
This is a brand new GM crate engine known as a ZZ454. Here's the GM write-up:
Oval-port aluminum heads deliver big power in an affordable package!
Our engineers took the 454 HO – with its super-tough, all-forged reciprocating assembly – and matched it with a set of higher-flow, ovalport aluminum cylinder heads to pick up an additional 15 horses, while still offering 500 lb.-ft. of torque. We dubbed it the ZZ454/440 and it’s an affordable high-performance Big-Block for any chassis you can stuff it in.
The ZZ454/440 uses our new cylinder block casting for greater strength and performance, while the aluminum heads use smaller, 110cc combustion chambers to boost compression to 9.6:1, up from 8.5:1 on the 454 HO. We then match the airflow capability with a high-lift, hydraulic roller camshaft that delivers great idle quality and requires no periodic lash adjustments.
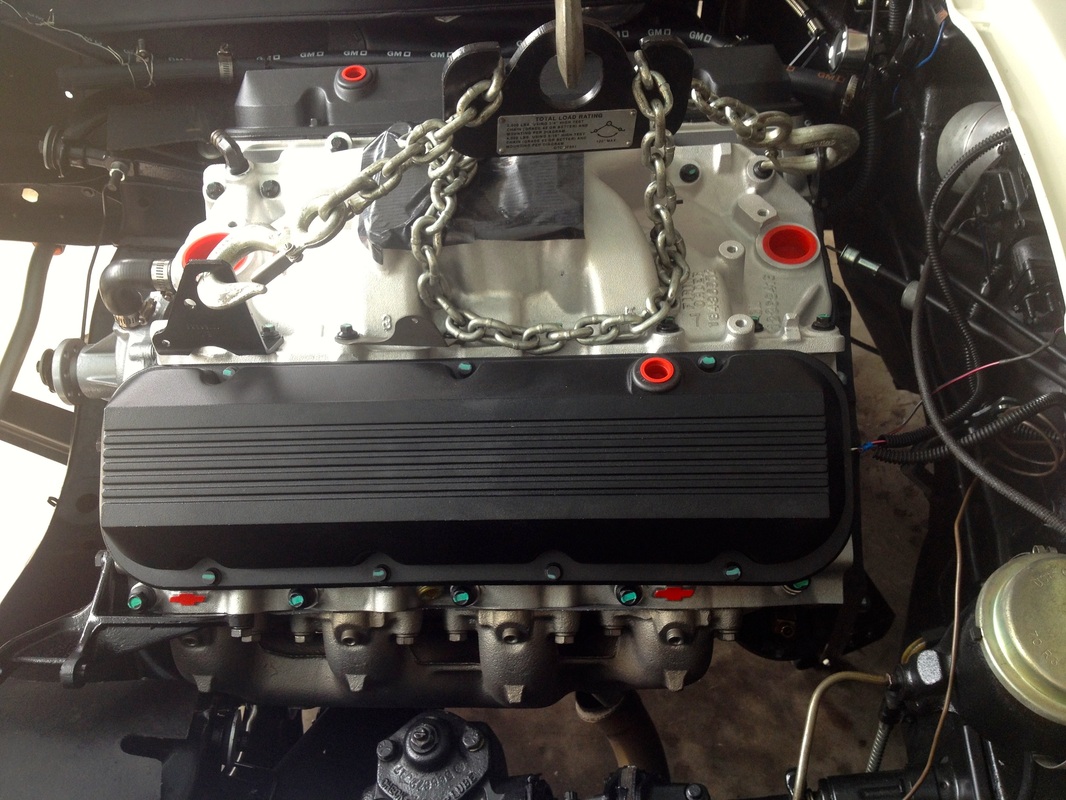
Our crate engine package includes the ZZ454/440 assembled with a water pump, balancer, aluminum intake manifold and a 14-inch flex plate. I changed out the flew plate for a GM externally balanced flywheel for my 4 speed.
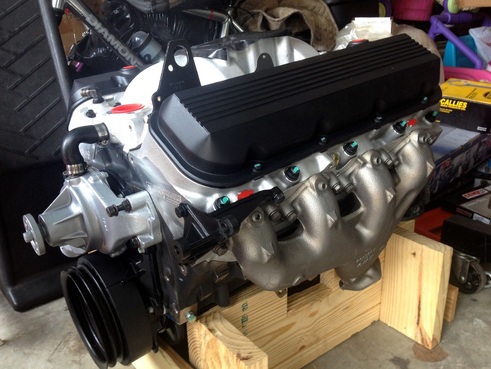
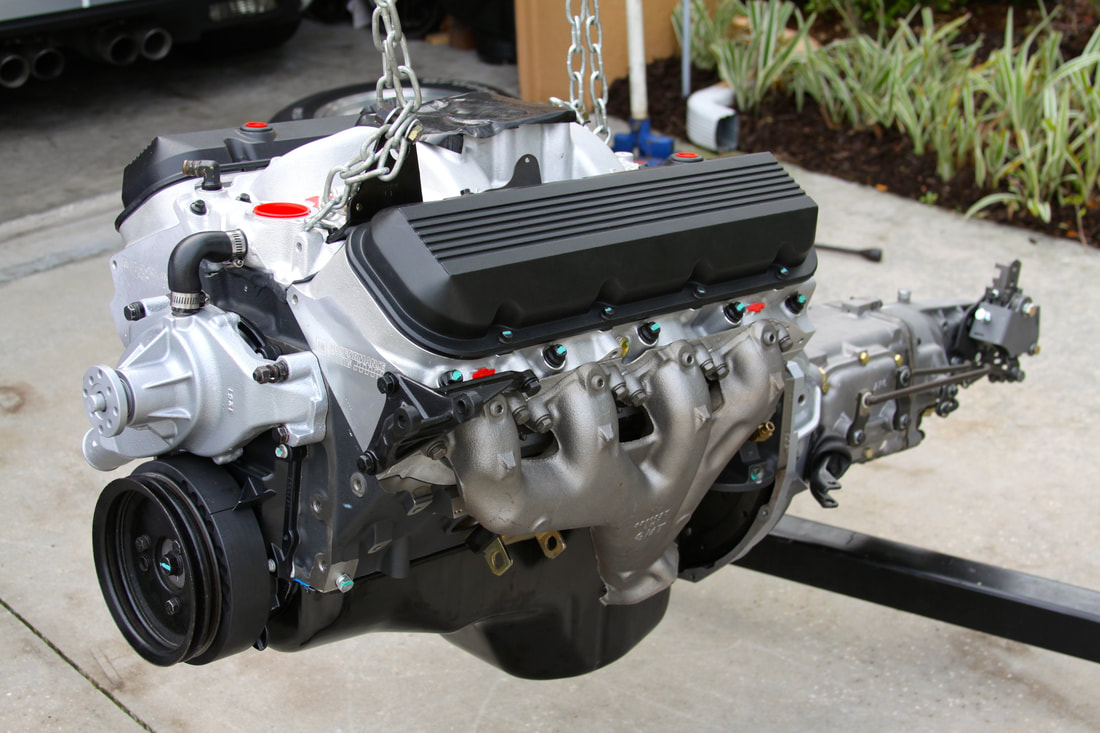
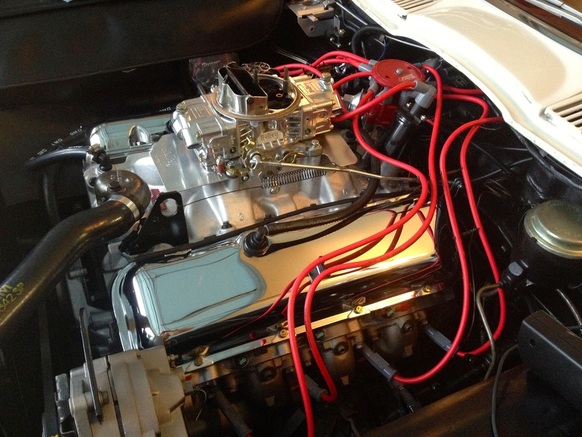
Pictured here is my engine with the exhaust manifolds connected and the water pump switched out from a long-style to short-style to accommodate the pulleys. Because I'm running stock cast iron maniolds on my engine, it took significant time to grind down the back side of the exhaust manifolds because the head bolts used were a tall version and interfered with a good fit. I didn't want to disturb the torque sequence of the heads by changing to shorter bolts. It was tedious but worth it in the long run.
Here are the specs:
GM Part Number: 12498777
Engine Type: Chevy Big-Block V-8
Displacement (cu in): 454
Bore x Stroke (in): 4.250 x 4.000
Block (P/N 19170538): Cast-iron with 4-bolt main caps
Crankshaft (P/N 14096983): Forged steel
Connecting Rods (P/N 19170198): Forged steel
Pistons (P/N 10215228): Forged aluminum
Camshaft Type (P/N 24502611): Hydraulic roller
Camshaft Lift (in): .510 intake / .540 exhaust
Camshaft Duration (@.050 in): 211° intake / 230° exhaust
Cylinder Heads (P/N 12363392): Aluminum oval port; 110cc chambers
Valve Size (in): 2.190 intake / 1.880 exhaust
Compression Ratio: 9.6:1
Rocker Arms (P/N 12368082): Stamped steel
Rocker Arm Ratio: 1.7:1
Water Pump (P/N 19168606): Cast-iron, long-style (changed to short-style)
Flywheel (P/N 14096987): 14"
Recommended Fuel: 92 octane
Ignition Timing: Base 4° BTDC, 26° Total (way low according to forum readings, may start at 10-12*)
Maximum Recommended rpm: 5,500
Balanced: External
Best part: Chevrolet Performance Crate Engines include a 24-month or 50,000-mile/80,000-kilometer limited warranty.
Oval-port aluminum heads deliver big power in an affordable package!
Our engineers took the 454 HO – with its super-tough, all-forged reciprocating assembly – and matched it with a set of higher-flow, ovalport aluminum cylinder heads to pick up an additional 15 horses, while still offering 500 lb.-ft. of torque. We dubbed it the ZZ454/440 and it’s an affordable high-performance Big-Block for any chassis you can stuff it in.
The ZZ454/440 uses our new cylinder block casting for greater strength and performance, while the aluminum heads use smaller, 110cc combustion chambers to boost compression to 9.6:1, up from 8.5:1 on the 454 HO. We then match the airflow capability with a high-lift, hydraulic roller camshaft that delivers great idle quality and requires no periodic lash adjustments.
Our crate engine package includes the ZZ454/440 assembled with a water pump, balancer, aluminum intake manifold and a 14-inch flex plate. I changed out the flew plate for a GM externally balanced flywheel for my 4 speed.
Pictured here is my engine with the exhaust manifolds connected and the water pump switched out from a long-style to short-style to accommodate the pulleys. Because I'm running stock cast iron maniolds on my engine, it took significant time to grind down the back side of the exhaust manifolds because the head bolts used were a tall version and interfered with a good fit. I didn't want to disturb the torque sequence of the heads by changing to shorter bolts. It was tedious but worth it in the long run.
Here are the specs:
GM Part Number: 12498777
Engine Type: Chevy Big-Block V-8
Displacement (cu in): 454
Bore x Stroke (in): 4.250 x 4.000
Block (P/N 19170538): Cast-iron with 4-bolt main caps
Crankshaft (P/N 14096983): Forged steel
Connecting Rods (P/N 19170198): Forged steel
Pistons (P/N 10215228): Forged aluminum
Camshaft Type (P/N 24502611): Hydraulic roller
Camshaft Lift (in): .510 intake / .540 exhaust
Camshaft Duration (@.050 in): 211° intake / 230° exhaust
Cylinder Heads (P/N 12363392): Aluminum oval port; 110cc chambers
Valve Size (in): 2.190 intake / 1.880 exhaust
Compression Ratio: 9.6:1
Rocker Arms (P/N 12368082): Stamped steel
Rocker Arm Ratio: 1.7:1
Water Pump (P/N 19168606): Cast-iron, long-style (changed to short-style)
Flywheel (P/N 14096987): 14"
Recommended Fuel: 92 octane
Ignition Timing: Base 4° BTDC, 26° Total (way low according to forum readings, may start at 10-12*)
Maximum Recommended rpm: 5,500
Balanced: External
Best part: Chevrolet Performance Crate Engines include a 24-month or 50,000-mile/80,000-kilometer limited warranty.
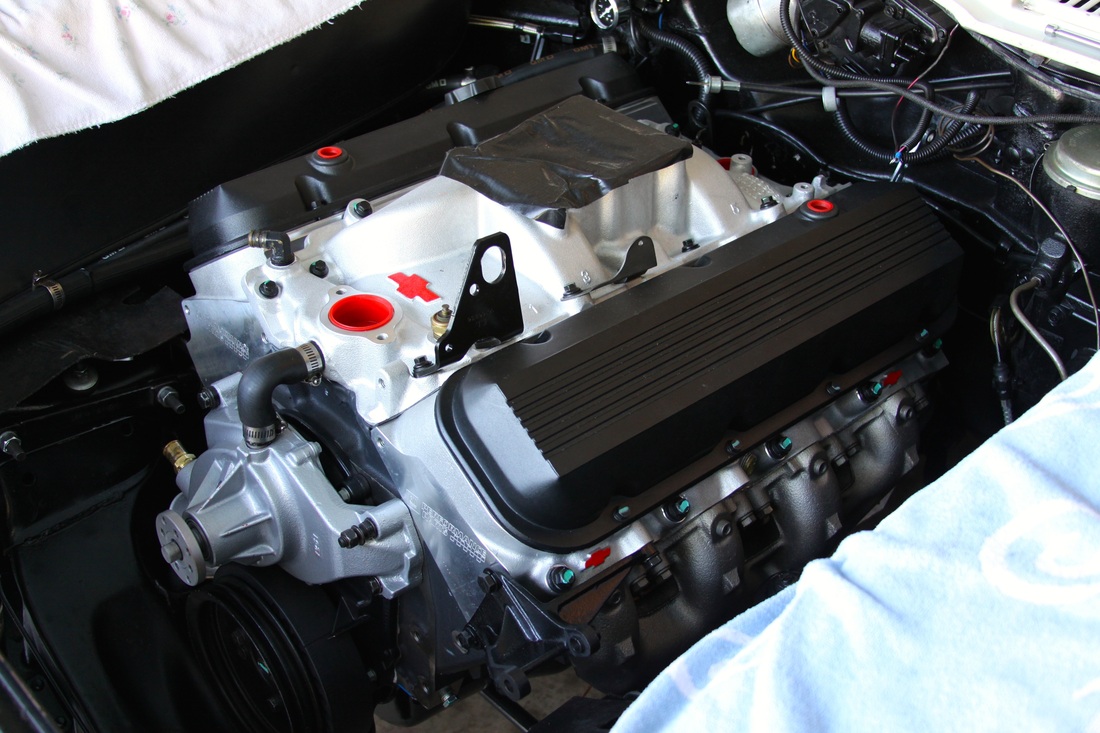
Starting the assembly 4/21/2014. It's now been more than 4 months since my car was on the road. There may be light at the end of the tunnel....
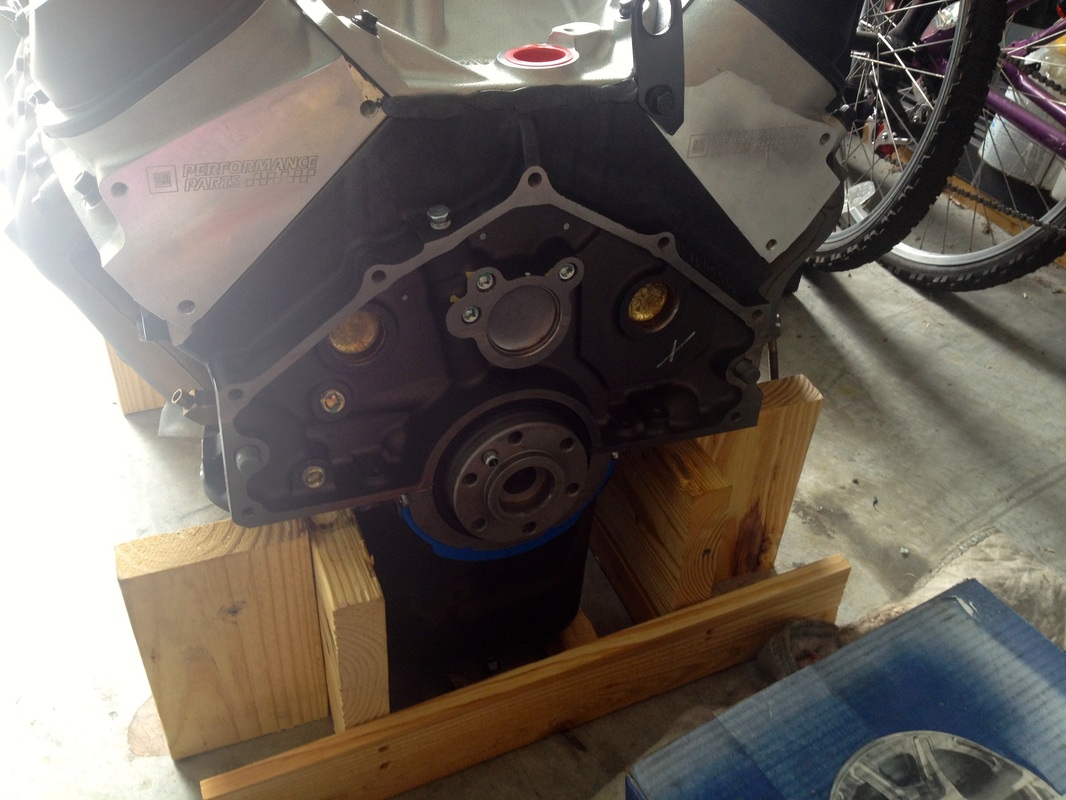

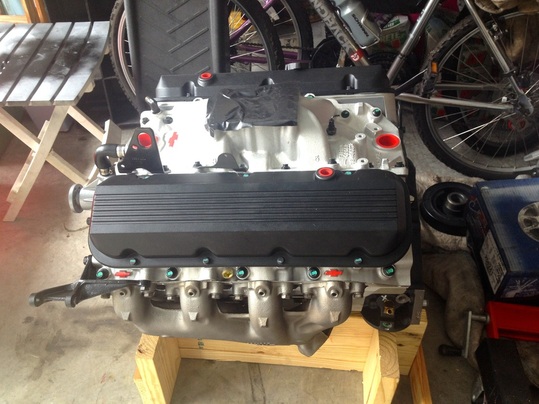
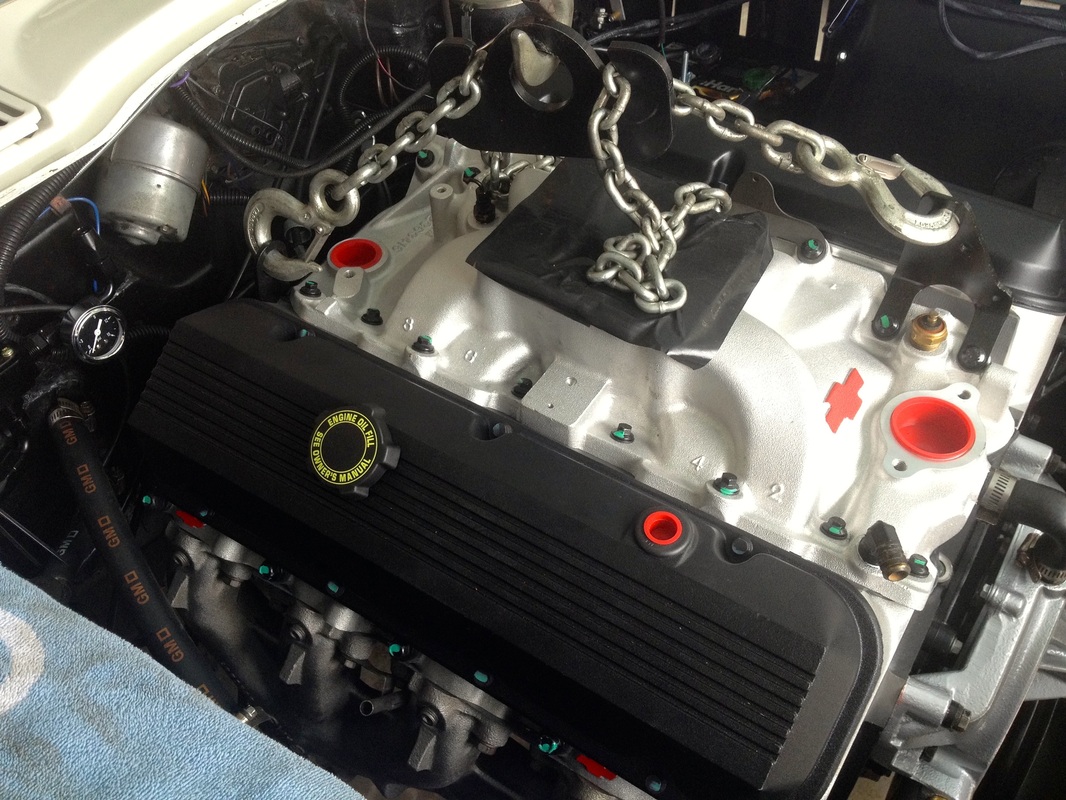
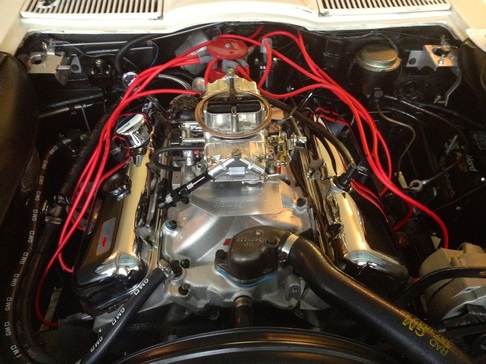
I started to enhance the look by painting the Chevy Bowties RED, adding the alternator bracket, and a few fittings to the intake manifold.
Always liked the look of Chevy Orange but this engine came nicely painted and detailed so decided to keep it the Black color. Detailed a few things with high temp Aluminum and red touches here and there. I had to change out the long nose water pump for a short nose one so my pulleys would lineup.
I "dry-fitted" the engine into the 65 Corvette to make sure that was adequate clearance for the oil pan. There was no tranny connected nor flywheel. So far, so good. The oil pan did however, lay 1" lower than my original pan. Will try this carefully for now and change out the pan if necessary due to ground clearance . Eventually, the oil pan had to be replaced with a 4" sump, scraped the 6" sump a few times.

Wednesday, April 23, 2014: Assembly continues..........
Before the marriage of the flywheel, clutch, pressure plate and bell housing, I had to adjust the adjustable clutch pivot ball using calculations. Hopefully, this time the geometry of the clutch linkage will be correct.
I installed the pilot bushing (needle bearing style), then put the new GM flywheel on the crank and torqued the bolts down to 60 lb-ft. After cleaning off the surface of the flywheel and pressure plate of unsightly fingerprints and grease, I located the 12" clutch and pressure plate using a clutch aligning tool. I proceeded to torque the pressure plate bolts to 35 kb-ft.
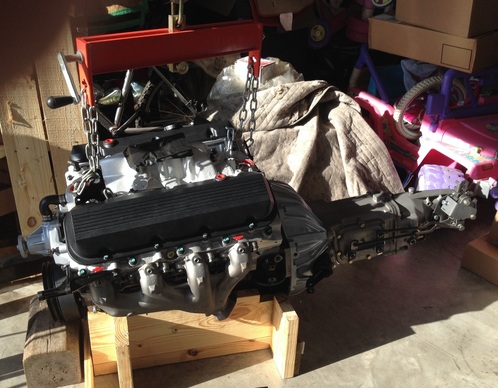
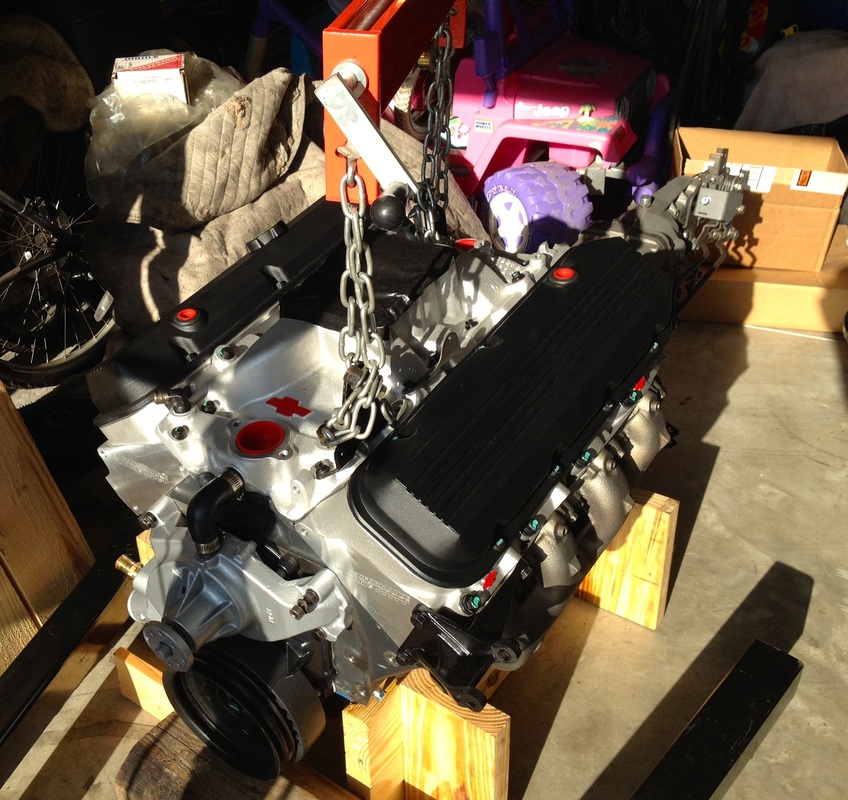
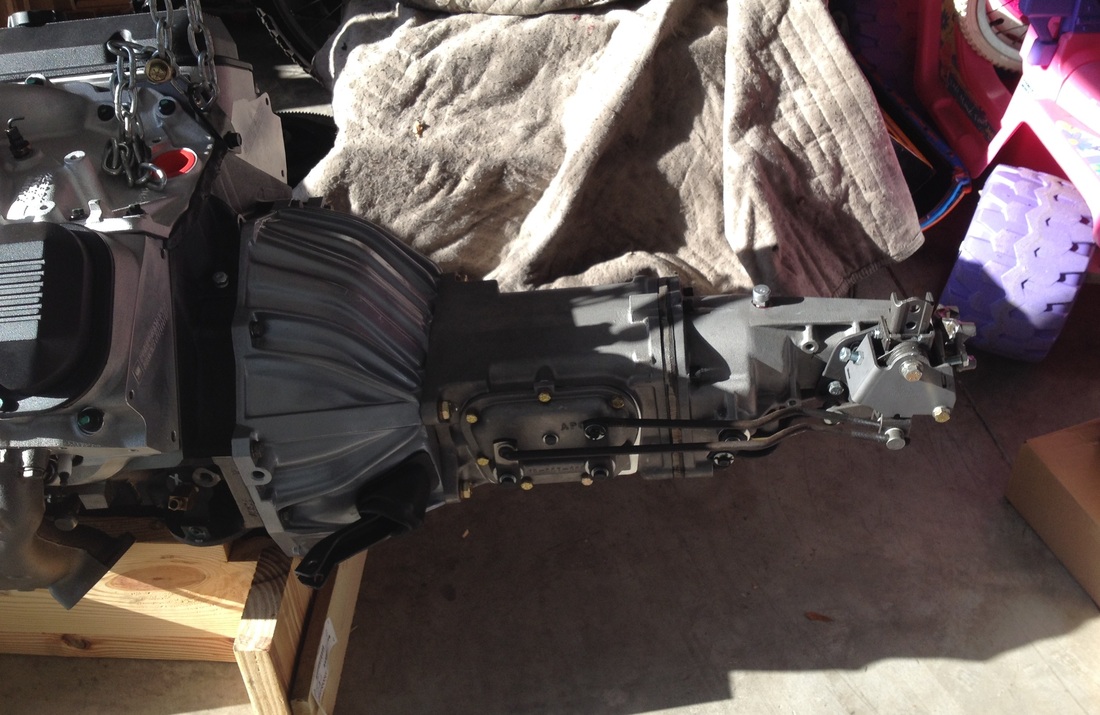
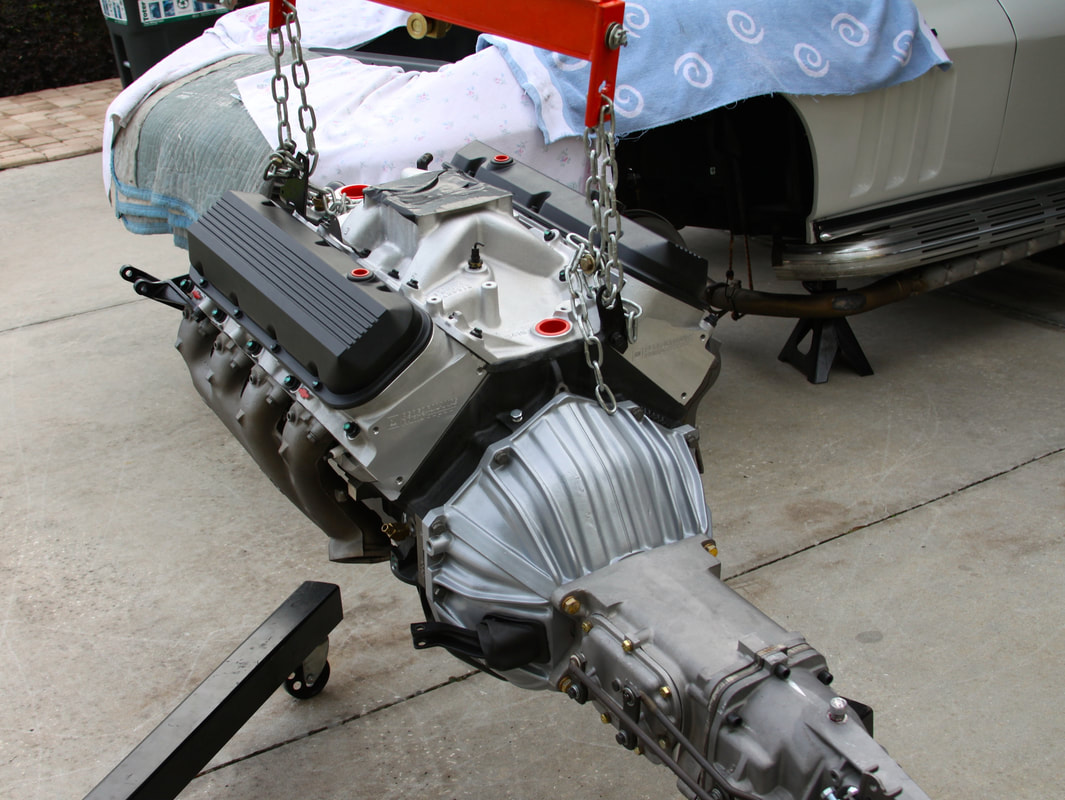
Next came the new Aluminum painted bell housing, went on without a hitch. Final step was to install my new Autogear M22W transmission, that too went smoothly.
Attached the tranny to the bell housing using 4 grade 8 bolts, tight and locked. These are the pictures to the above and below of the engine and tranny ready for installation, hopefully on Thursday. We'll see how much we remembered from the previous install :)
I installed the pilot bushing (needle bearing style), then put the new GM flywheel on the crank and torqued the bolts down to 60 lb-ft. After cleaning off the surface of the flywheel and pressure plate of unsightly fingerprints and grease, I located the 12" clutch and pressure plate using a clutch aligning tool. I proceeded to torque the pressure plate bolts to 35 kb-ft.
Next came the new Aluminum painted bell housing, went on without a hitch. Final step was to install my new Autogear M22W transmission, that too went smoothly.
Attached the tranny to the bell housing using 4 grade 8 bolts, tight and locked. These are the pictures to the above and below of the engine and tranny ready for installation, hopefully on Thursday. We'll see how much we remembered from the previous install :)


Thursday, April 24, 2014: Installation Process started.........
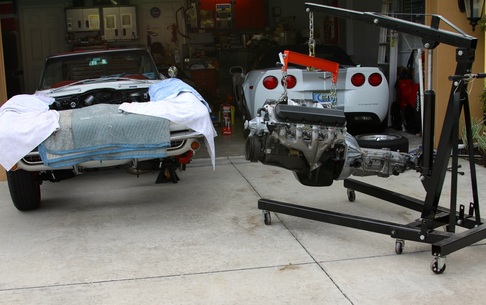
Around 7:30AM on Thursday morning, I got the preliminary work out of the way. I pulled the car out of the garage part way. Then ya see, you have to jack the car up & remove the drivers side tire so the hoist can fit as close to the car as possible. That done, I pulled the engine/tranny combo out of the garage and got it ready in position. Around 8:30AM, my good buddy and comrade in arms, my brother-in-law Lou, showed up. We jockeyed the hoist into final position near the car, jacked the engine up pretty high and began the process of getting all that tough metal into the engine bay. It wasn't without a couple of little struggles but only because the angle at which we were entering was a bit steeper than it should have been. After 45 minutes, we locked both motor mount bolts into place and, HOPEFULLY, never to come out again.
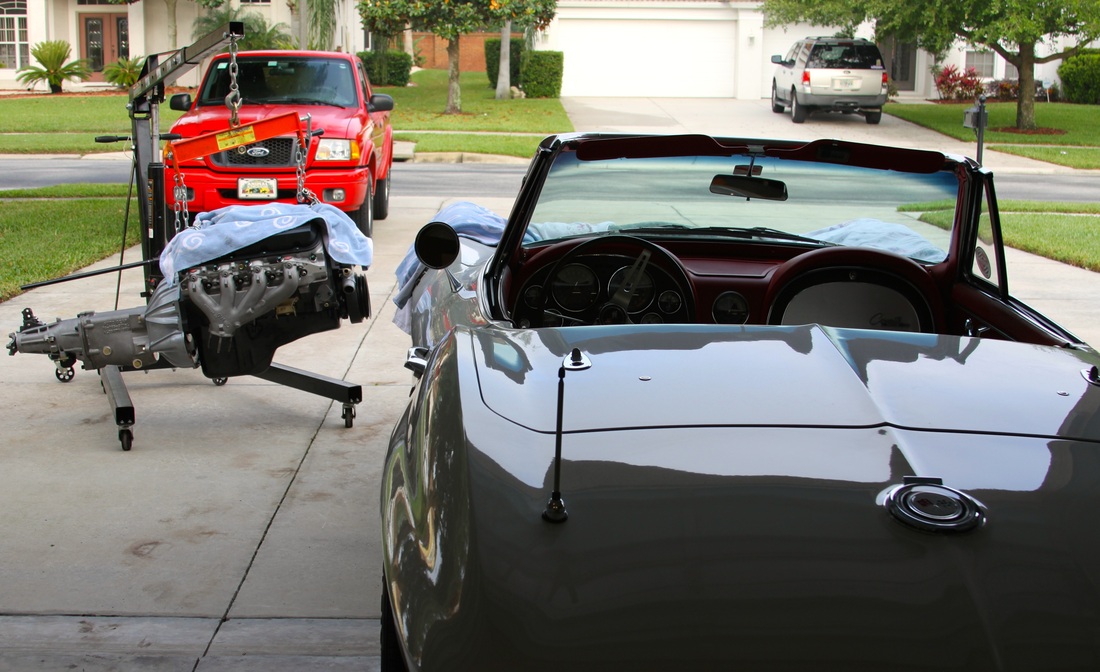


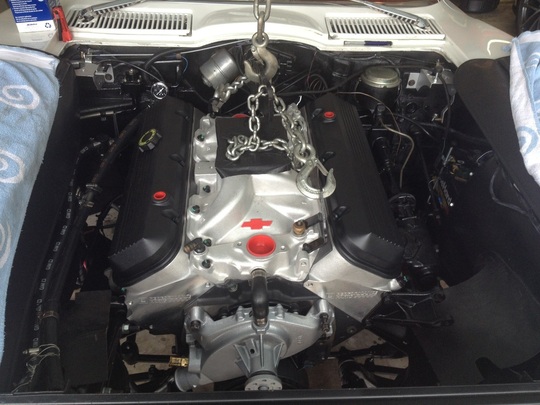
Success at last......... the new ZZ454 takes up it's rightful place in the engine bay of the 65 Corvette
|
|
|
Thursday - Sunday: 4/24 - 4/27: Now for the fun part.....hooking everything back up!

After a productive couple of hours, it was now time crawl underneath and hookup the driveshaft, transmission cross member, speedo cable. Once that was completed, I moved to the front of the car, jacked it up and proceeded to hookup the side pipes back to their respective manifolds. Also connected my ground braided cables to each side of the oil pan to provide a good ground for the electrical system. It seemed so much easier this time probably because all the bolts & nuts were clean and lubed from the previous install. I couldn't find a source for a bell housing inspection plate. The original one I had wouldn't fit the one-piece rear main and the crank snout. I looked and looked at it and figured I could cut the existing cover to fit the space I had available. That's exactly what I did so I now have a nice cover covering my flywheel from any debris that might prove harmful. Replubmbed the fuel line and set the new Mallory distributor in place. Connected the new MSD ignition wires but wasn't ready to test fire yet. Lots of little things yet to do but the time keep seeming to run away from me as Sat & Sun came along but not much done.
Monday 4/28/2014
As the weekend passed, got a lot of stuff hooked up and ready to go. Took Sat off for a dinner outing with friends. Family matters came into play on Sunday as we took the grand daughters to play miniature golf at Disney, what a blast, full of fun and laughs.
Monday rolled around and everything was set to fire the engine up for the 1st time. Ahhhh, but the gremlins were still at work. Timing was a big issue again, popping back thru the carb on various tries. Reset the balancer mark, reset the distributor, set to 10-12* initial but no luck. Kinda walked away from it, went for a swim and just tried to relax after a frustrating morning. Got thinking, with if the engine came, although it was set at TDC on the balancer, what if it was actually 180* out. Went back out, flipped the distributor 180*, and she fired right up. What a great sound. Hooked up the variable timing light, set initial to 16*, watched the centrifugal go up to 36* at 3200RPM's, where it should be. Plugged in the vacuum line but the timing jumped to 52*, quite a bit high. Felt confident that engine ran very smooth so I actually took the 65 out for a spin around the block. Everything worked awesome. Backed it back into the garage until I get the timing switched from direct vacuum to ported vacuum. That all came about after a quick call to Mallory about issues with the distributor tach housing. This dizzy likes to run on ported vacuum and the vacuum advance is actually adjustable. That I'll save for the next time working on it. Finally SUCCESS with a new engine!
Monday rolled around and everything was set to fire the engine up for the 1st time. Ahhhh, but the gremlins were still at work. Timing was a big issue again, popping back thru the carb on various tries. Reset the balancer mark, reset the distributor, set to 10-12* initial but no luck. Kinda walked away from it, went for a swim and just tried to relax after a frustrating morning. Got thinking, with if the engine came, although it was set at TDC on the balancer, what if it was actually 180* out. Went back out, flipped the distributor 180*, and she fired right up. What a great sound. Hooked up the variable timing light, set initial to 16*, watched the centrifugal go up to 36* at 3200RPM's, where it should be. Plugged in the vacuum line but the timing jumped to 52*, quite a bit high. Felt confident that engine ran very smooth so I actually took the 65 out for a spin around the block. Everything worked awesome. Backed it back into the garage until I get the timing switched from direct vacuum to ported vacuum. That all came about after a quick call to Mallory about issues with the distributor tach housing. This dizzy likes to run on ported vacuum and the vacuum advance is actually adjustable. That I'll save for the next time working on it. Finally SUCCESS with a new engine!
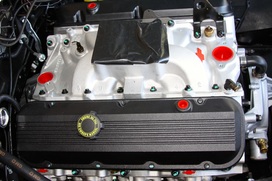
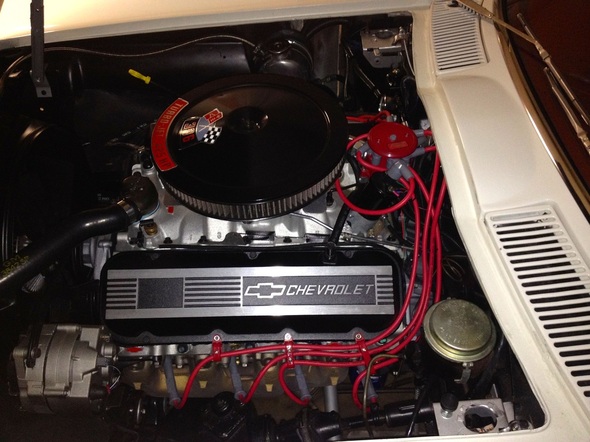
Here's the engine now dressed a bit with the chrome valve covers installed, Mallory Distributor and MSD Low Resistance wires. Need to work on setting the timing correctly, she's pulling about 52* right now which is too high for this engine. I'll try and get the timing to 16-18* initial, readjust the mechanical to 18-20* and let the vacuum advance come in with 8-12*.
June 11, 2014: It's been a while since I last posted; have had a lot of home projects to finish. My car and particularly the engine are running super. So nice to drive my car with no issues, a rarity with older vintage cars. I just have to do a final timing tweak to get advance curve set for street driving but all is well, no leaks, no vibrations and plenty of power.
A few changes under the hood
July 2014:
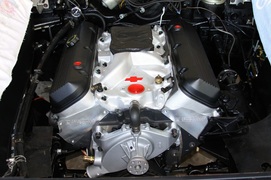
As you can see in the pictures above, I had the chrome BB valve covers which I loved. After a routine valve cover gasket change, I noticed that the breather baffle inside was broken almost in half. The broken part was lying next to the rocker arms. Talk about a disaster waiting to happen. After cleaning up the baffle area, I noticed the the top side of the valve cover had 4 indents where the rockers were actually hitting the valve covers, another potential disaster! I could have probably adapted a thicker gasket to clear the rockers arms but decided to switch to the GM Performance covers you see here. They fit perfectly and seal very nicely. They did come with 454 badges but trying to get a 396 badge to affix in the rectangle to the left side. I really wanted the cast orange CHEVROLET covers but they came with only 1 hole drilled into one cover, no provision for PCV or breathers, didn't want to try and drill out the bosses. (PLUS they were really dam expensive).
As you can see in the pictures above, I had the chrome BB valve covers which I loved. After a routine valve cover gasket change, I noticed that the breather baffle inside was broken almost in half. The broken part was lying next to the rocker arms. Talk about a disaster waiting to happen. After cleaning up the baffle area, I noticed the the top side of the valve cover had 4 indents where the rockers were actually hitting the valve covers, another potential disaster! I could have probably adapted a thicker gasket to clear the rockers arms but decided to switch to the GM Performance covers you see here. They fit perfectly and seal very nicely. They did come with 454 badges but trying to get a 396 badge to affix in the rectangle to the left side. I really wanted the cast orange CHEVROLET covers but they came with only 1 hole drilled into one cover, no provision for PCV or breathers, didn't want to try and drill out the bosses. (PLUS they were really dam expensive).
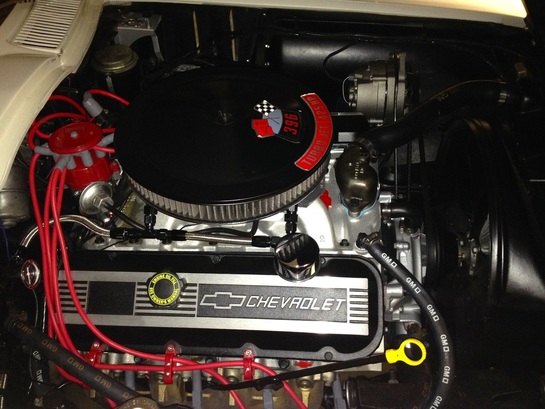
Also incorporated wires looms to keep the wires looking somewhat decent in the engine compartment. I will eventually try to use the original chrome shielding for my distributor once the timing is set correctly & locked in place.
TIME FOR A LITTLE CHANGE.....November 2015
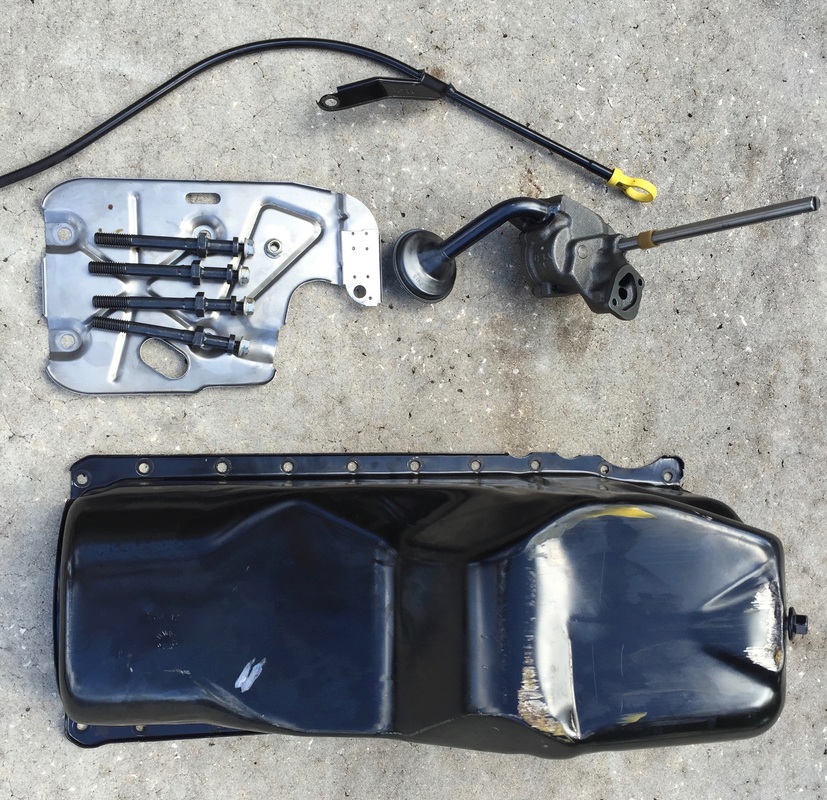
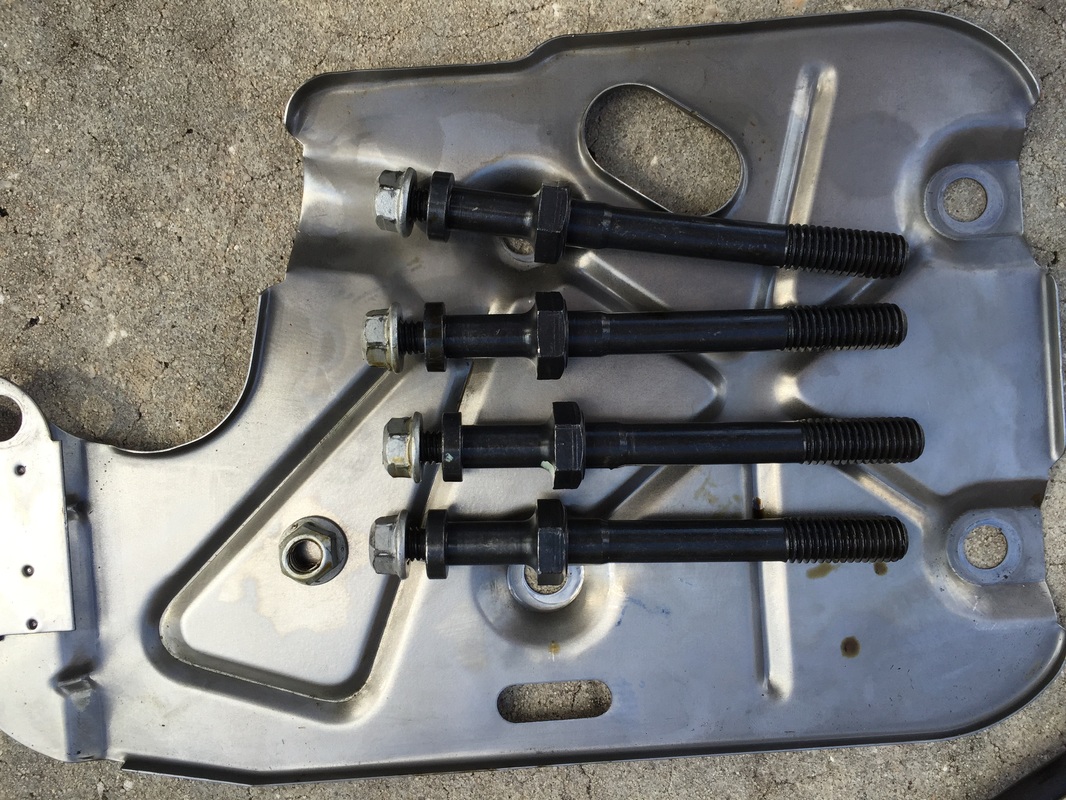
As you can see in the picture to the left, my big block C2 Corvette's oil pan sneaky out of the bottom. Well, the 6 qt pan was a bit too deep and I had only about 3-4" of ground clearance. Even when I went over any speed bumps extremely slow, I would still bottom out the pan. The deep sump sits behind the front wheels so even though the wheels would clear easily, the pan was next in line for the slam. Before a major disaster hit, I decided to change out the 6 qt pan for a GM 4 qt pan; probably should have done it prior to installing the engine. Jacked up the 65 in the garage, put it on jack stands and went to town. The pictures below tell the story what was removed.
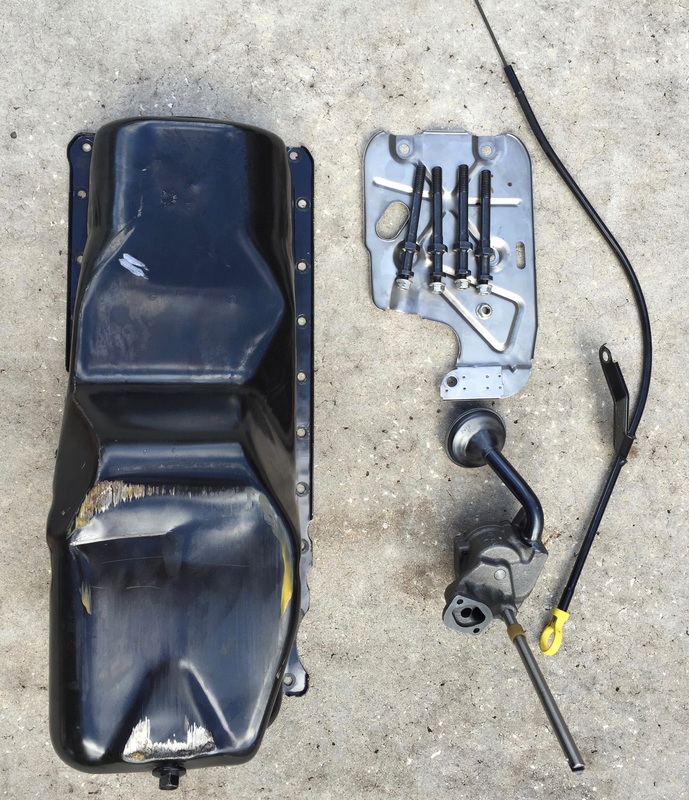
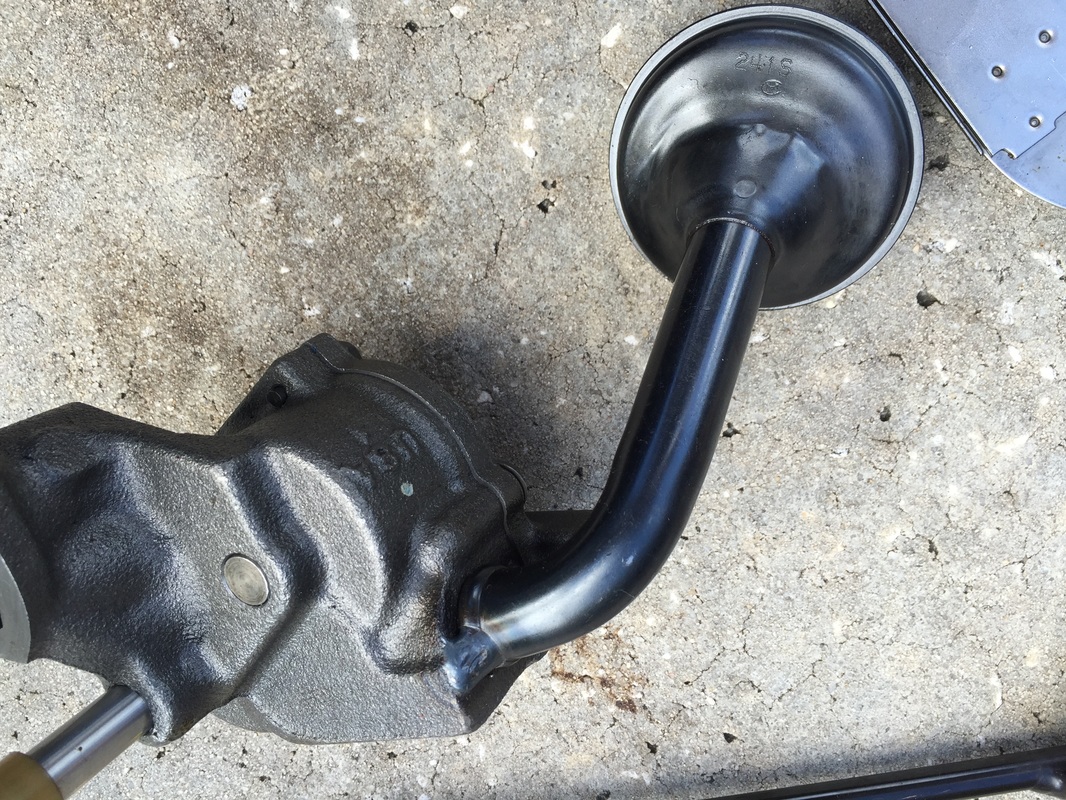
This is the entire original GM 6 quart oil pan that came on my ZZ454. As you can see in the pictures below, it's out of my car. After dropping the center drag link and tie rod arms, that gave me the space to simply unbolt the pan and drop it out of the car. Well, that entailed also removing the windage screen and bolts, oil pump w/screen pickup, oil dip stick as well as the dip stick tube. I had to order a new oil pump and pickup w/screen for the 4 quart pan.
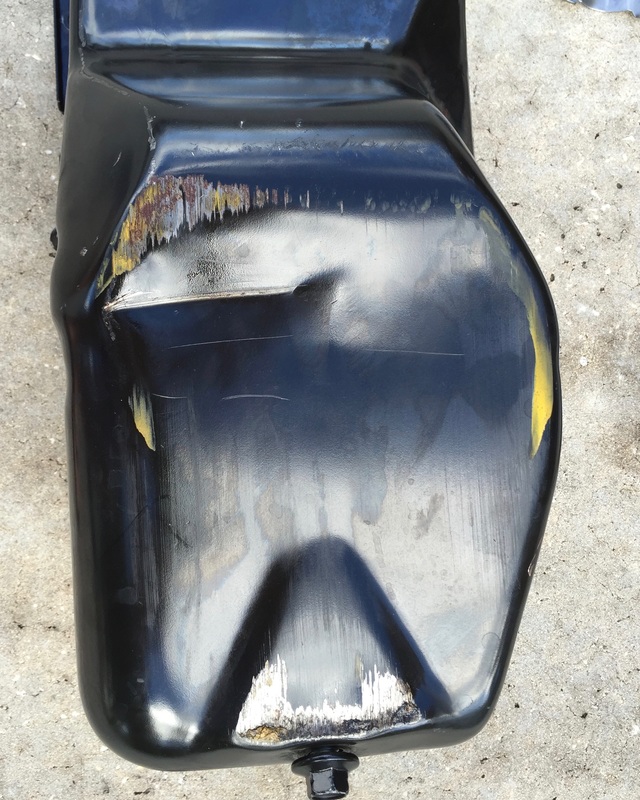
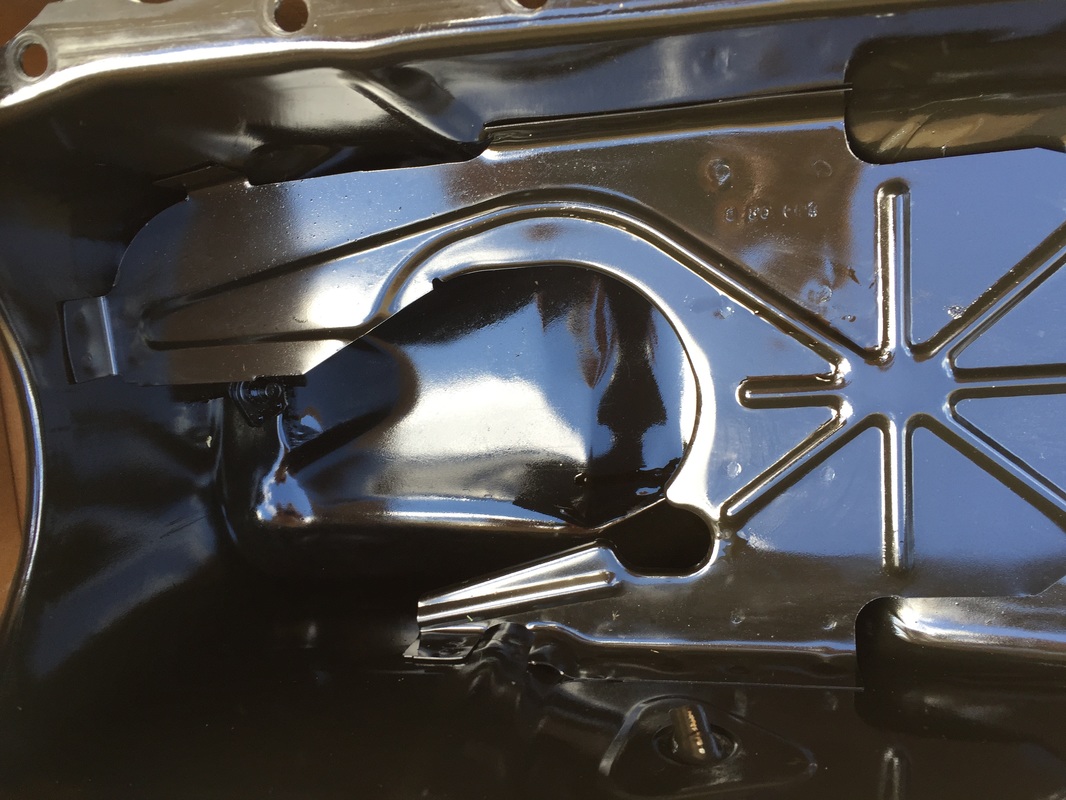
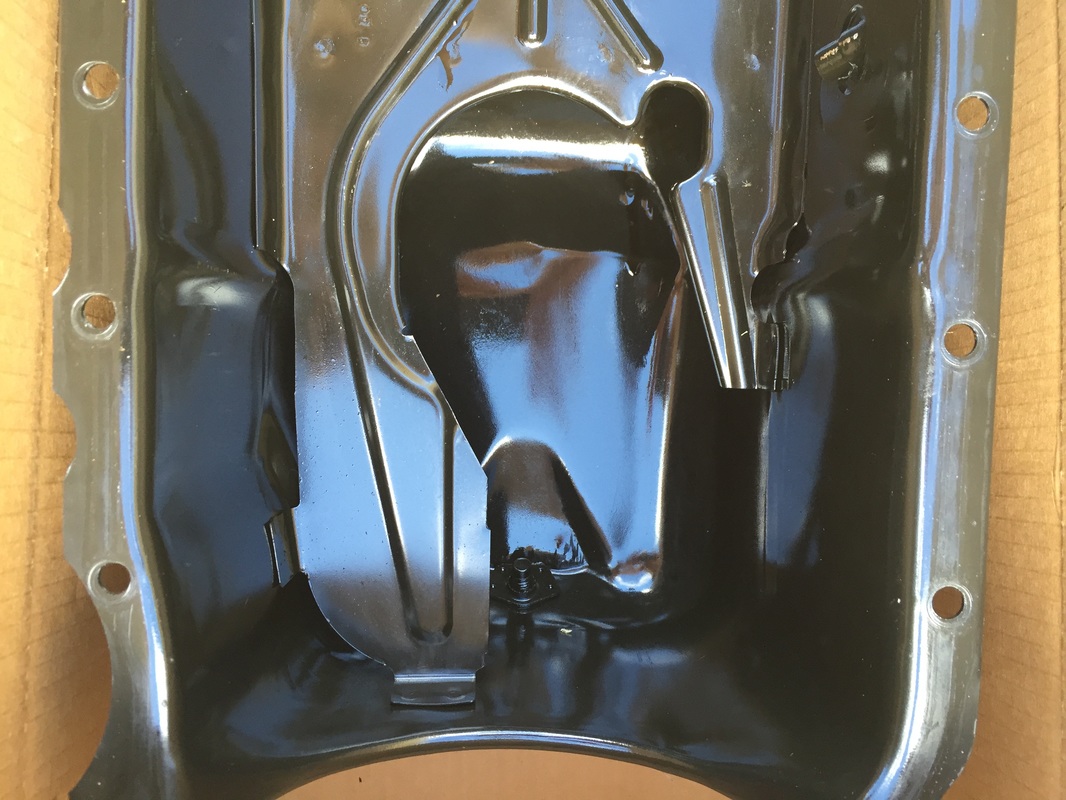
The large crease on the deep sump was actually put there went we dropped the engine in between the motor mounts but kinda missed. The scrapes however, are results from the pan bottoming on the speed bumps.
The large crease on the deep sump was actually put there went we dropped the engine in between the motor mounts but kinda missed. The scrapes however, are results from the pan bottoming on the speed bumps.